
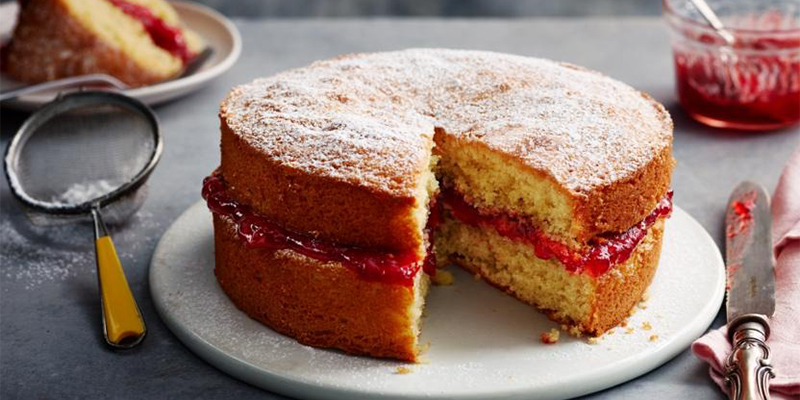

Few cakes embody elegance and simplicity quite like the Victoria Sponge Cake. With its light, fluffy sponge and luscious layers of jam and cream, this British classic has stood the test of time. But what makes it so special? Why has it remained a staple at afternoon teas and birthday cakes for generations? Let’s take a deep dive into the delicious world of Victoria Sponge Cake, uncovering its royal origins, the secrets to baking it to perfection, and, of course, the age-old debate: jam or cream first?
A Cake Worthy of a Queen
The Victoria Sponge Cake is no ordinary treat—it has royal heritage! Named after Queen Victoria, this delicate dessert became a favourite at her afternoon tea gatherings in the 19th century.
Back then, teatime was a refined affair, and Queen Victoria herself adored a good cake to accompany her tea. The Victoria Sponge Cake was born as a lighter alternative to the denser fruitcakes of the era, featuring a soft vanilla sponge, a layer of jam, and (eventually) cream.
Over the years, this cake has cemented itself as a British icon, gracing tables at everything from garden parties to birthday celebrations. It’s simple yet sophisticated, elegant yet indulgent—a true classic that has never gone out of style.
The Magic of Two Simple Layers
What makes a Victoria Sponge Cake so irresistible? It’s the harmony of just a few key ingredients: light, airy sponge; sweet, fruity jam; and rich, silky cream. Despite its simplicity, each bite delivers a perfect balance of flavours and textures.
- The Sponge: Soft, buttery, and infused with vanilla, the sponge forms the heart of this classic cake. It’s traditionally made with equal parts butter, sugar, eggs, and flour, creating a beautifully even crumb.
- The Filling: A generous spread of strawberry or raspberry jam adds just the right amount of sweetness. Some bakers prefer homemade jam for an extra touch of authenticity!
- The Cream: While early versions of the cake omitted cream, modern takes often include whipped or clotted cream for added indulgence.
The result? A cake that is as light as air yet satisfyingly rich, perfect with a steaming cup of tea.
Baking Like Royalty: Secrets to the Perfect Sponge

The Victoria Sponge Cake may be simple, but achieving that perfect, melt-in-the-mouth texture takes a little finesse. Here are some golden rules to ensure your sponge turns out beautifully every time:
The Right Ingredients
Quality matters! Always use fresh eggs, good-quality butter, and fine caster sugar for the best results. Self-raising flour is key to achieving a light sponge, but if you only have plain flour, add a teaspoon of baking powder.
Room Temperature is Everything
Cold ingredients don’t mix well! Make sure your butter and eggs are at room temperature before you start baking.
The Creaming Method
Whipping the butter and sugar together until pale and fluffy introduces air into the mixture, helping the sponge rise perfectly.
Don’t Overmix!
Once you add the flour, mix gently. Overmixing will result in a dense sponge—no one wants that!
Even Baking is Key
Bake your sponges on the middle shelf at 160°C (fan) or 180°C (conventional oven). If possible, use identical cake tins and weigh the batter for even layers.
Follow these steps, and you’ll be baking a sponge fit for royalty in no time!
From Oven to Table: The Ultimate Victoria Sponge Cake Recipe
Ready to bake your own? Follow this simple yet delicious Vanilla Spongecake Recipe to create a perfect Victoria Sponge Cake every time.
Ingredients Victoria Cake:
- 200g unsalted butter, softened
- 200g caster sugar
- 4 large eggs
- 200g self-raising flour
- 1 tsp vanilla extract
- 2 tbsp milk
- 5 tbsp strawberry or raspberry jam
- 200ml double cream, whipped
- Icing sugar, for dusting
Method:
1. Preheat the Oven – Set the Stage for Baking Magic
- Before anything else, get your oven nice and toasty!
- Preheat it to 180°C (160°C fan) and line two 20cm cake tins with parchment paper.
- It ensures an even bake and easy removal!
2. Cream the Butter & Sugar – The Secret to a Fluffy Sponge
- In a large mixing bowl, beat unsalted butter and caster sugar together until the mixture is pale, light, and fluffy—about 3-5 minutes of mixing should do the trick!
- This step incorporates air into the batter, setting the foundation for a soft, delicate sponge.
- If it looks grainy, keep mixing—it should resemble smooth, whipped frosting!
3. Add the Eggs & Vanilla – Building Flavour One Step at a Time
- Crack in four eggs, one at a time, mixing well after each addition.
- If the batter starts looking a bit curdled—don’t panic! A tablespoon of flour can help bring it back together.
- Finally, stir in a teaspoon of vanilla extract for that warm, sweet aroma that makes Victoria Sponge Cake irresistible.
4. Fold in the Flour – The Gentle Touch for a Perfect Sponge
- Sift self-raising flour into the mixture and gently fold it in with a spatula using light, sweeping motions.
- This keeps the batter airy and prevents a dense sponge.
- If the mixture feels too thick, add a splash of milk to loosen it up to a soft dropping consistency.
5. Bake – Time for the Magic to Happen!
- Divide the batter evenly between the two prepared tins—yes, you can weigh them for accuracy if you want perfection!
- Smooth the tops and bake for 20-25 minutes, or until the cakes are golden, risen, and spring back when lightly pressed.
- Resist the urge to keep opening the oven door—the heat fluctuation could cause your cakes to sink!
6. Cool Completely – Patience is Key!
- Once baked, let the sponges cool in their tins for 5 minutes before transferring them to a wire rack to cool completely.
- This prevents soggy bottoms (we all know how much Paul Hollywood hates those!) and ensures a perfect texture for layering.
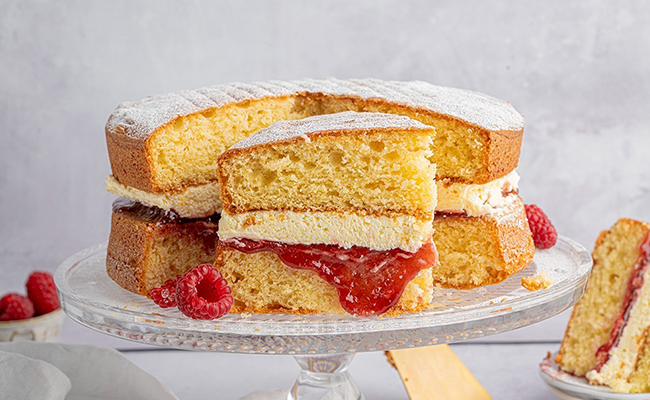
7. Assemble the Cake – The Art of Layering
- Place one sponge onto a serving plate. Spread a generous layer of strawberry or raspberry jam over it (or go wild with another fruit flavour!).
- If you’re adding cream, whip it to soft peaks and spread it over the jam.
- Then, gently place the second sponge on top, pressing lightly to sandwich everything together.
8. Dust & Serve – The Final Touch of Elegance
- A light dusting of icing sugar over the top is the perfect finishing touch.
- Now, grab a cup of tea, slice into your masterpiece, and enjoy the fruits of your (not-so-hard) labour!
- Simple, elegant, and utterly delicious!
The Great Debate: Jam or Cream First?
Now, onto the age-old question: should you spread jam or cream first?
- Team – Jam First: Many argue that jam should go first to allow it to seep slightly into the sponge, creating a more flavourful bite.
- Team – Cream First: Others insist that cream should be spread first, creating a stable base for the jam and preventing any unwanted sogginess.
While there’s no definitive answer (and even the Queen’s bakers have stayed neutral on the matter!), one thing is certain: however you assemble it, a Victoria Sponge Cake always tastes divine.
One Bite, Endless Bliss – Let’s Bake!
And there you have it—the delightful story and secrets of the Victoria Sponge Cake! Whether you’re a seasoned baker or a beginner in the kitchen, this cake is a joy to make and even better to eat.
So, what are you waiting for? Grab your mixing bowl, preheat that oven, and create your own Victoria Cake masterpiece. And remember—whether you spread jam or cream first, every bite will be nothing short of royal perfection!
Happy baking!