
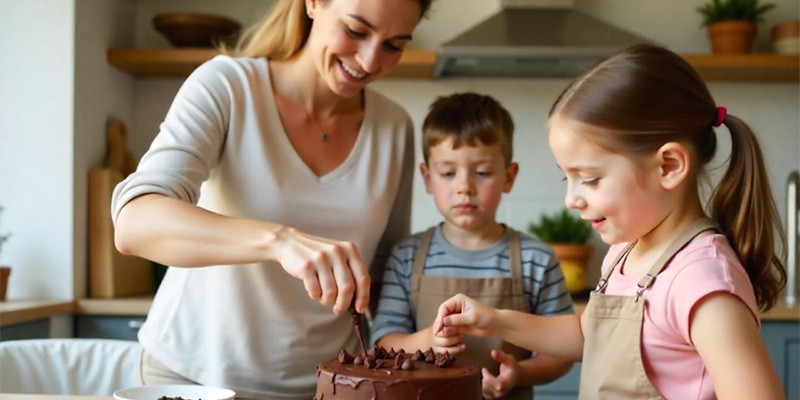


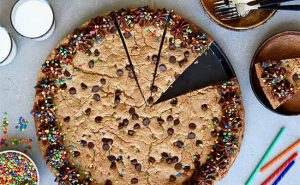
There’s something magical about baking a cake for someone you love—especially on a special occasion like Mothers Day. It’s a time to show appreciation and love, and what better way to do that than with a homemade cake filled with the rich, melty goodness of chocolate chips?
If you’ve ever tried baking with chocolate chips, you might have noticed a few challenges. Maybe they sink to the bottom, don’t melt the way you expect, or just don’t distribute evenly. But don’t worry! Today, we’re going to share our best chocolate chip baking tips so you can create a delicious, heart-warming cake for your mom, that looks as good as it tastes.
Choosing the Chocolate Chips
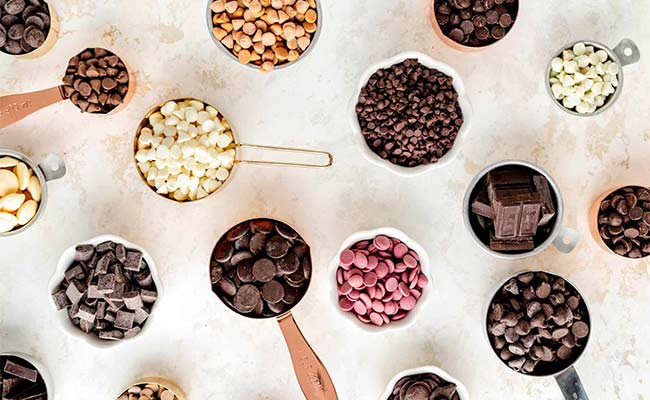
Before we dive into the baking process, let’s talk about ingredients. The type of chocolate chips you use can make a big difference. Here are a few things to keep in mind:
- Go for Quality: High-quality chocolate chips have a richer taste and smoother texture. Look for brands that use real cocoa butter instead of vegetable oil.
- Pick the Right Type: Semi-sweet chocolate chips are a great all-rounder, but dark chocolate chips add depth and intensity. If you’re making a sweeter cake, white or milk chocolate chips can add balance.
- Size Matters: Standard-sized chips work well in most recipes, but if you want a gooey, melty effect, try chocolate chunks or mini chocolate chips.
- Flavour Enhancements: Consider using flavoured chocolate chips like caramel, sea salt, or espresso-infused for a more sophisticated taste.
- Homemade Chocolate Chunks: Instead of store-bought chips, chop up a high-quality chocolate bar for irregular pieces that melt beautifully into the cake.
Once you’ve got your chocolate chips, you’re ready to start baking!
Preventing Chocolate Chips from Sinking
Have you ever baked a cake, only to find all the chocolate chips sitting at the bottom? It’s a common issue, but luckily, I’ve got a few tricks to help you keep them evenly distributed:
- Coat in Flour: Toss the chocolate chips in a tablespoon of flour before adding them to the batter. This helps them “stick” in place rather than sinking.
- Thicker Batter is Better: If your batter is too thin, chocolate chips will naturally drop to the bottom. If needed, reduce the liquid slightly or add an extra spoonful of flour.
- Layer the Chips: Instead of mixing them all in at once, try layering them. Pour half the batter into the tin, sprinkle in some chocolate chips, then add the rest of the batter and another layer of chips.
- Chill the Batter: Letting your batter rest in the fridge for 10–15 minutes before baking can help suspend the chips more evenly throughout the cake.
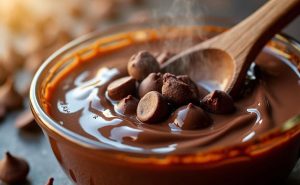
Melting Chocolate Chips Properly
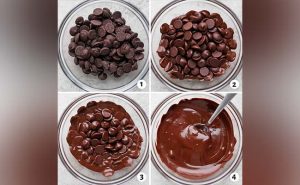
If your recipe calls for melted chocolate, you want to make sure you’re doing it correctly so that it doesn’t seize up or burn. Here’s how to melt chocolate chips like a pro:
- Double Boiler Method: This is the safest way to melt chocolate. Place a heatproof bowl over a pot of simmering water, making sure the bottom of the bowl doesn’t touch the water. Stir gently until melted.
- Microwave Method: If you’re short on time, place the chocolate chips in a microwave-safe bowl and heat in 20-second bursts, stirring in between. Stop once they’re almost melted—residual heat will do the rest.
- Avoid Water at All Costs: Even a tiny drop of water can make melted chocolate seize up and become grainy. Make sure your bowl and utensils are completely dry.
- Use a Little Butter or Oil: Adding a teaspoon of butter or coconut oil can help make the melted chocolate smoother and shinier.
Getting the Perfect Texture

A cake should be moist, soft, and delicious, right? But sometimes, when baking with chocolate chips, the texture can turn out a little dry or too dense. Here’s how to get it just right:
- Don’t Overmix: Overmixing develops the gluten in the flour, leading to a tougher cake. Mix until just combined.
- Use Room Temperature Ingredients: Eggs, butter, and milk should all be at room temperature before you start. This ensures a smoother batter and even baking.
- Bake at the Right Temperature: Too high, and the edges cook before the centre. Too low, and the cake won’t rise properly. Stick to the recommended temperature in your recipe and avoid opening the oven door too soon.
- Add Sour Cream or Yoghurt: A spoonful of sour cream or Greek yoghurt can add extra moisture and richness to the cake.
Creative Chocolate Chip Additions

If you really want to make your Mother’s Day desserts extra special, why not experiment a little? Here are some fun ways to elevate your cake:
- Chocolate Swirl Effect: Melt some chocolate chips and swirl them through the batter with a toothpick before baking.
- Chocolate Chip Streusel Topping: Mix chocolate chips with brown sugar, cinnamon, and butter, then sprinkle it on top before baking for a crunchy finish.
- Stuffed Cake Layers: Add a surprise inside by layering melted chocolate or chocolate chip ganache between cake layers.
- Nutty Crunch: Fold in chopped nuts like hazelnuts or almonds for a delightful crunch.
- Caramel Drizzle: A drizzle of homemade caramel sauce pairs beautifully with chocolate chips.
Decorating Your Mother’s Day Cake
The final touch is the decoration! Once your cake has cooled, here are some easy yet impressive ways to make it look stunning:
- Chocolate Drizzle: Melt extra chocolate chips and drizzle over the top for a glossy finish.
- Whipped Cream & Berries: Fresh strawberries, raspberries, or blueberries add colour and a refreshing contrast to the chocolate.
- Edible Flowers: Decorate with edible flowers like violets or rose petals for a sophisticated touch.
- Dusting of Icing Sugar: Sometimes, simplicity is best. A light dusting of icing sugar can make your cake look effortlessly elegant.
- Chocolate Shavings: Use a vegetable peeler to create delicate chocolate curls for a professional touch.
Storing Leftovers (If There Are Any!)

If by some miracle you have leftovers, here’s how to keep your cake fresh:
- Room Temperature: Store in an airtight container for up to three days.
- Refrigeration: If your cake has cream or perishable toppings, keep it in the fridge for up to a week.
- Freezing: Wrap slices in cling film and store in a freezer-safe bag. Defrost at room temperature when ready to eat.
Ready to Bake?
Now that you’ve got all the chocolate chip baking tips, it’s time to put them to use! Whether you’re baking a simple sponge or an elaborate layer cake, these tips will help you create a Mothers Day cake that’s packed with flavour, love, and, of course, delicious chocolate chips.
So, grab your mixing bowl, preheat that oven, and let’s make this Mothers Day extra sweet!