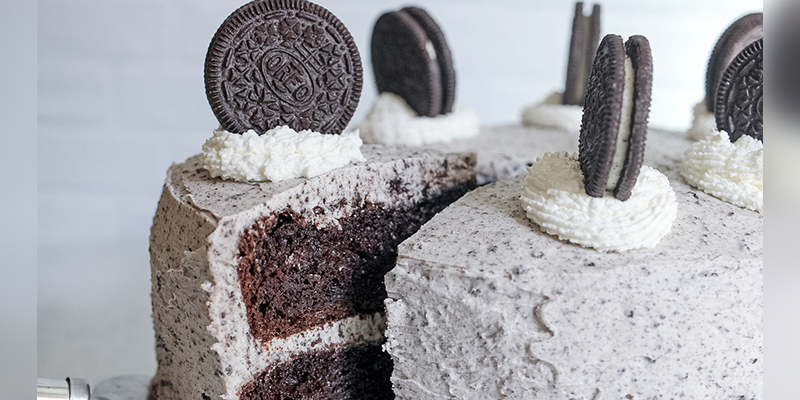
Oreo cakes blend the classic flavors of a traditional cake with the beloved crunch of Oreo cookies, creating a delightful treat for all occasions. This heavenly cake has gained popularity among various dessert lovers because of its ultimate unique taste, texture, and variety of presentation. Regardless of whether you are a new baker or an experienced home cook, the process of how to make an Oreo cake is a fun and rewarding one. This guide will take you through everything you need to know-about oreo cake recipes, frosting options, decoration tips, and gluten-free adaptations.
What is an Oreo Cake Made Of?
An Oreo cake includes moist cake layers, which may be either chocolate or vanilla but are intertwined with pieces of Oreo cookies mixed within the batter. It will give the cake that rich, unique flavor and texture. The main ingredients needed for the oreo cake recipe include all-purpose flour, sugar, eggs, baking powder, milk, vanilla extract, and crushed Oreos; however, recipes may include cocoa powder to provide an intense flavor and base. What makes an Oreo cake different from any other cake is the use of Oreo pieces in both batter and frosting; it has that perfect crunch throughout, although the Oreo pieces will be slightly softened with baking, giving the cake such moisture and flavor while carrying over the taste from the cookies.
How to Make an Oreo Cake from Scratch
Ingredients of Oreo Cake Recipe:
- 1 ½ cups all-purpose flour
- 1 cup granulated sugar
- ½ cup cocoa powder (optional for chocolate Oreo cake)
- 1 tsp baking powder
- 1 tsp baking soda
- ½ tsp salt
- 2 large eggs
- 1 cup milk
- ½ cup vegetable oil
- 2 tsp vanilla extract
- 1 cup crushed Oreos
Instructions for Oreo Cake Recipe :
-
Prepare the Oven and Pans: Preheat your oven to 350°F (175°C). Grease and line two 8-inch round cake pans to prevent sticking.
-
Mix Dry Ingredients: In a large mixing bowl, sift together the flour, sugar, cocoa powder (if using), baking powder, baking soda, and salt. This ensures even distribution of dry ingredients and helps prevent clumps in the batter.
-
Combine Wet Ingredients: In a separate bowl, whisk together the eggs, milk, vegetable oil, and vanilla extract until smooth. Gradually add the wet mixture to the dry ingredients, mixing until just combined.
-
Add the Oreos: Gently fold in the crushed Oreos, being careful not to overmix, as this could make the cake dense.
-
Bake: Divide the batter evenly between the two prepared pans. Bake for 25-30 minutes, or until a toothpick inserted into the center comes out clean. Allow the cakes to cool in the pans for about 10 minutes, then transfer them to a wire rack to cool completely before frosting.
Best Frosting Options for an Oreo Cake Recipe
1. Oreo Buttercream Frosting:
Classic, this is what you get when you mix some crushed Oreos to your traditional butter cream frosting: added pieces of cookies give flavors and slight crunches, really augmenting the experience of Oreos altogether. You can even make it more decadent by layering it very thick in between cake tiers, or you can use it to create decorative swirls on top of the cake.
2. Cream Cheese Frosting:
This tangy frosting rounds out the sweetness of this cake with its creamy texture and subtle sharpness. Adding crushed Oreos to cream cheese frosting can elevate its flavor while still keeping the frosting light.
3. Whipped Cream Frosting:
Light and airy, not overly sweet, whipped cream frosting gives the same glory to the flavor of the Oreo itself. It suits those who want a slightly lighter cake but would still love their frosting creamy. One could also add crushed Oreos to the mix by folding in finely crushed Oreos.
How to Use Gluten-Free Oreos in an Oreo Cake Recipe
For those with gluten intolerance or celiac disease, using gluten-free Oreos makes it possible to enjoy this classic cake. The gluten-free Oreos in comparison to their counterpart enjoy the same taste and texture; thus, the substitution cannot affect the taste. The process is very easy-the entire process involves substituting regular Oros with their gluten-free versions using equal measurements. The end product is a cake retaining its full indulgent flavor, but it makes it very safe to eat for those of you sensitive to gluten.
Occasions Perfect for Serving Oreo Cake
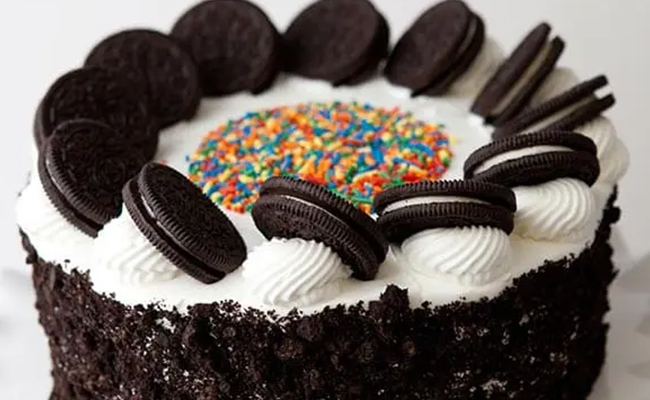

Savoring Oreo cake is versatile as it can be a dessert for various occasions. It brings little excitement and nostalgia to the occasion. Here are some events when Oreo cake is surely a great hit:
1. Birthday Parties:
Fill the Oreo cake with Oreo cookie halves, colorful sprinkles, and frosting swirls for that fantastic appeal. Kids and adults alike will enjoy the familiar taste of Oreo.
2. Holiday Celebration:
Decorate an Oreo cake for a specific holiday, red and green sprinkles at Christmas or themed cookie toppers for Halloween.
3. Family Reunions:
There is nothing better than coming home for dinner when comforted by a slice of Oreo cake, flavors recognizable to appeal to everyone.
4. Office Potlucks and School Events:
Easy to slice and share, Oreo cakes are a crowd-pleasing dessert that stands out among traditional options.
Baking Tips for a Moist Oreo Cake
Moist and tender Oreo cakes don’t just ‘happen.’ They require careful measuring, proper mixing, and thoughtful ingredient choices. Here are some tips to make sure your cake turns out perfectly every time.
1. Accurate Measuring:
Too much flour will make your cake dry. Use a kitchen scale to measure flour for the best outcome. When using measuring cups, fill with flour loosely and then use a flat edge-spoon to shave off excess to avoid packing too much flour in the measuring cup.
2. Do not Overmix:
Tend not to overmix the batter or you are going to generate an awful lot of gluten; it’s going to feel like a brick. Mix your ingredients just until just combined. Stop whenever you do not see any streaks of flour anymore inside the batter.
3. Add Moisture-Rich Ingredients:
Adding sour cream, yogurt, or buttermilk to the batter adds moisture and gives a tender crumb. Acidity reacts with baking agents which lightens and fluffs the cake. Even a little can make a big difference to overall texture.
4. Ingredients at Room Temperature:
Using room temperature eggs, milk, and butter makes it easier to mix well because this ensures a smoother batter so that cake will be uniformly baked. Cold ingredients can result in lumpy batter or uneven batter, so get those out about 30 minutes before you are going to start.
Substituting Other Cookies in the Recipe
While Oreos are the star, you can get creative and substitute them with other cookies for a different twist on this cake. Consider using chocolate chip cookies, mint-flavored cookies, or even peanut butter cookies for a distinct flavor profile. This adaptability allows for endless experimentation and personalization.
Decorating and Presenting Your Oreo Cake
The most exciting part of baking an Oreo cake is decorating and serving. Decorating an Oreo cake requires creativity and turns an ordinary cake into a beautiful centerpiece for any type of party. It can be from elegant touches to funny whimsical designs; possibilities are limitless. Here are some ideas on how you could make your Oreo cake visually pleasing and unforgettable.
Birthday Party Decorations:
Add Oreo halves around the edges of the cake, standing upright for dramatic flair, or flat for a touch. Use a piping bag to add swirly designs on top and sides of the cake. Alternate the swirly patterns with a mini Oreo on top for a visual impact. Sprinkle crushed Oreos all over the top surface for texture and flavor; have fun with colors-only colored frosting could match the birthday theme or party decor.
Creative Toppings:
Add lots of creative toppings to your Oreo cake and take it to the next level. Melted chocolate or caramel drizzled on top is a great sophisticated touch, or crushed candy pieces such as M&M’s, toffee bits, or gummy candies will add pops of fun color and texture. Topped with colorful sprinkles, these cakes make a super fun treat for kids’ parties or any informal gathering.
Oreo Cake Pops:
Transform any leftover Oreo cake into delightful bite-sized cake pops. Start by crumbling the cake into small pieces, then mix it with a small amount of frosting until it forms a sticky, moldable dough. Shape the mixture into balls and insert a lollipop stick into each one.
Layering with Different Flavors:
Take leftover Oreo cake to a whole new level by making you turn them into these adorable cake pops. Crush the cake to fine crumbs, mix a little frosting with it until it’s resembling a sticky molding dough. Roll the mixture into balls and insert a lollipop stick into each one. You then dip the cake balls into melted chocolate, white chocolate, or candy melts and put them into the fridge until the coating is set.
Best Way to Store an Oreo Cake After Baking
Keep your Oreo cake fresh for up to two days by storing it in an airtight container at room temperature. If you have to refrigerate the cake, be sure it’s well-covered so that it does not dry out completely. For longer storage, you can individually wrap your slices in plastic wrap and foil. This ensures moisture in and flavor within the cake for easier consumption later.
Favorite Ways to Enjoy Oreo Cake
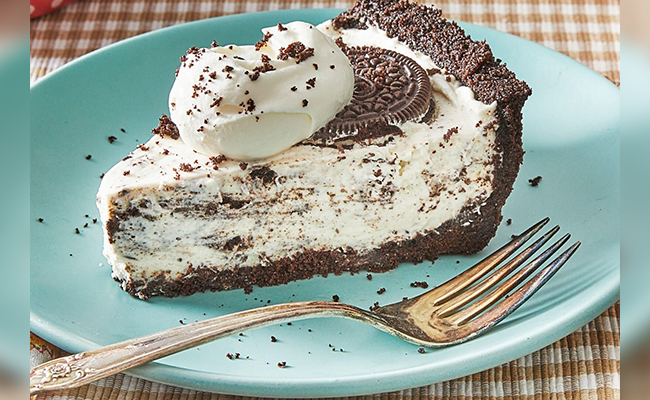

Savor a slice of Oreo cake with a cold glass of milk, creamy vanilla ice cream, or a hot cup of coffee. Rich, chocolate flavor of the cake complements the crunchy texture of the Oreos for a great experience. Enjoy this special treat during a celebration and surely please your sweet tooth as well as everyone’s who tastes it.
So, if you are craving oreo cakes or divine chocolate cakes and wish to binge eat without the hassle of baking, just order online without thinking twice.
More Recipe:
Lemon Blueberry Cake Recipe
Strawberry Cake Recipe
Tom Cruise Cake Recipe
Pinata Cake Recipe
Unicorn Cake Recipe
Funnel Cake Recipe

